
Singer sewing machines are renowned for their durability and versatility, offering a wide range of models from vintage to modern, heavy-duty, and computerized designs. Whether you’re a hobbyist or a professional, understanding your machine through its manual is key to unlocking its full potential, ensuring safety, and maintaining performance. This guide provides a comprehensive overview of Singer sewing machines, their features, and proper usage, helping you get the most out of your sewing experience.
Overview of Singer Sewing Machines
Singer sewing machines are trusted for their reliability, versatility, and innovative features, catering to both beginners and experienced sewists. With a legacy spanning over a century, Singer offers a diverse range of models, from vintage classics like the 201K to modern heavy-duty and computerized machines; These machines are designed for various sewing needs, including embroidery, quilting, and heavy-duty stitching. Singer manuals provide detailed guidance on operation, maintenance, and troubleshooting, ensuring optimal performance. Whether you’re working on delicate fabrics or thick materials, Singer sewing machines are equipped to handle diverse projects with precision and ease, supported by accessible resources and manuals.
Importance of Using the Manual
Using the Singer sewing machine manual is essential for optimal performance, safety, and longevity of your machine. It provides detailed guidance on operation, maintenance, and troubleshooting, ensuring you understand every feature and function. The manual highlights safety precautions, proper threading techniques, and lubrication requirements, helping you avoid damage and maintain your machine effectively. Whether you’re a novice or experienced sewer, the manual serves as a comprehensive resource to maximize your sewing experience and keep your Singer machine running smoothly for years to come.

Understanding the Singer Sewing Machine Manual
The Singer sewing machine manual provides comprehensive guidance on setup, maintenance, troubleshooting, and advanced features, ensuring users maximize their machine’s potential and sewing experience effectively.
Structure and Layout of the Manual
The Singer sewing machine manual is organized into clear, logical sections, starting with an introduction and safety guidelines. It then details machine components, maintenance, threading, and basic operations. Advanced features like stitch settings and troubleshooting are covered in dedicated chapters. Visual aids such as diagrams and charts are included to simplify complex instructions. The manual also features an index for quick reference, ensuring users can easily locate specific information. Icons and symbols are explained to enhance understanding. This structured approach ensures users can progress from basic to advanced operations seamlessly, making the manual an essential resource for all skill levels.
Safety Guidelines and Precautions
The Singer sewing machine manual emphasizes essential safety guidelines to ensure safe operation. Always unplug the machine when not in use or during maintenance. Avoid wearing loose clothing or jewelry that could get caught in moving parts. Keep children and pets away while sewing. Use the correct voltage and avoid overloaded power outlets. Handle needles and sharp objects with care, and never touch them while the machine is operational. Follow proper threading techniques to prevent accidents. Regularly inspect the machine for damage or wear and tear. Adhere to these precautions to maintain a safe sewing environment and prevent potential hazards.
Icons and Symbols Used in the Manual
The Singer sewing machine manual uses icons and symbols to convey instructions clearly and efficiently. Common icons include the power button, oil can, and thread spool, each representing specific actions or components. These symbols are often color-coded or accompanied by brief explanations to ensure clarity. They appear throughout the manual, particularly in operation guides, maintenance sections, and troubleshooting tips. Referencing these icons helps users quickly identify steps or warnings without reading lengthy descriptions. The manual may also include a dedicated section explaining each symbol in detail, ensuring users can interpret and apply the guidance effectively for safe and proper machine operation.

Parts and Accessories of Singer Sewing Machines
Singer sewing machines include essential components like the sewing head, motor, and bobbin. Accessories such as presser feet, needles, and threads enhance functionality. Singer emphasizes quality and compatibility.
Identifying Machine Components
Familiarizing yourself with the Singer sewing machine components is essential for smooth operation. Key parts include the sewing head, bobbin area, tension dials, and stitch selectors. The control panel features buttons for stitch selection and speed adjustment. Additional components like the presser foot, feed dogs, and spool pins are vital for fabric handling. Accessories such as extra needles, bobbins, and presser feet are often included. The manual provides detailed diagrams to help identify each part. Understanding these components ensures proper use and maintenance, enhancing your sewing experience. Always refer to the manual for specific part locations and functions.
Accessories Included with the Machine
Accessories included with Singer sewing machines enhance your sewing experience. Typically, you’ll find extra needles, bobbins, and various presser feet for different fabric types, such as zigzag, blind hem, and zipper feet. Additional items may include a seam ripper, screwdriver, and spool caps. These accessories ensure versatility and convenience, allowing you to tackle various projects without extra purchases. They are thoughtfully designed to support different sewing needs and ensure optimal machine performance. Refer to your manual for a detailed list, as contents may vary by model.
Using Singer Branded Oils and Lubricants
Using Singer branded oils and lubricants is essential for maintaining your sewing machine’s optimal performance. These products are specifically designed to meet Singer’s standards, ensuring compatibility and longevity. Apply Singer oil to the shuttle hook, bobbin area, and other moving parts as recommended in the manual. Regular lubrication prevents friction, reduces wear, and ensures smooth operation. Avoid using generic oils, as they may not provide the same protection. Always clean the machine before applying Singer oils to maximize effectiveness. Proper lubrication extends the machine’s lifespan and keeps it running efficiently for years of reliable service.
Maintenance and Care
Regular maintenance ensures your Singer sewing machine operates smoothly. Clean the bobbin area, remove dust, and oil moving parts. Check for loose screws and align needles properly.
Routine Cleaning and Maintenance
Regular cleaning is essential for optimal performance. Turn off and unplug the machine. Use a soft brush to remove lint and debris from the bobbin area, feed dogs, and stitch plate; Oil the machine periodically with Singer-branded oil, focusing on moving parts. Avoid over-oiling to prevent residue buildup. Wipe the exterior with a damp cloth and dry thoroughly. Check for loose screws and tighten them gently. Proper maintenance ensures smooth operation and extends the machine’s lifespan. Refer to the manual for specific cleaning intervals and guidelines tailored to your Singer model.
Oil and Lubrication Tips
Proper lubrication ensures smooth operation. Use Singer-branded oil for optimal performance. Apply a few drops to the shuttle hook and tension discs as specified in the manual. Avoid over-lubrication, as excess oil can attract dust and cause mechanical issues. Wipe away any spilled oil immediately to prevent stains. Lubricate after cleaning to ensure debris doesn’t mix with oil. For computerized models, check if lubrication is required, as some are pre-lubricated. Regular oil changes maintain sewing quality and prevent friction damage. Always refer to the manual for model-specific lubrication recommendations to keep your machine running efficiently.
Troubleshooting Common Issues
Identify and resolve common Singer sewing machine issues quickly. If the machine won’t turn on, check the power cord and ensure it’s properly plugged in. For uneven stitches, verify thread tension, needle alignment, and bobbin installation. Thread jams often occur due to incorrect threading or lint buildup; clean the machine and rethread carefully. Noise or vibration may indicate misalignment or lack of lubrication. Refer to the manual for model-specific troubleshooting guides. Regular maintenance and proper usage can prevent many issues; Persistent problems may require professional servicing to ensure optimal performance and extend machine lifespan.
Threading and Basic Operations
Master the basics of threading and sewing with your Singer machine. Start by correctly winding the bobbin and threading the machine, ensuring the thread is properly seated in the take-up lever. Gently pull the thread to align the bobbin, then begin sewing with a steady pace. Always backstitch at the start and end for secure seams. Keep the fabric moving smoothly to maintain even stitches.
Step-by-Step Threading Guide
Threading your Singer sewing machine is essential for proper operation. Begin by placing the spool on the spool pin and guiding the thread through the tension discs. Pull the thread gently to ensure it seats correctly in the take-up lever. Next, wind the bobbin by placing the thread through the bobbin winder and turning the handwheel. Insert the bobbin into the machine, ensuring it clicks into place. Pull the bobbin thread through the stitch plate and under the presser foot. Finally, pull both threads together to prepare for sewing. Always test on a scrap fabric before starting your project.
Understanding Basic Stitching Operations
Mastering basic stitching operations is crucial for efficient sewing. The Singer machine offers a variety of stitches, including straight, zigzag, and backstitch. Straight stitch is ideal for straight lines, while zigzag is perfect for stretchy fabrics. Backstitch reinforces seams at the beginning and end. Adjusting stitch length and width ensures proper fabric handling. Always test stitches on scrap fabric before sewing your project. Familiarize yourself with the stitch selector dial or button, depending on your model. Proper tension ensures even stitching. Refer to the manual for specific stitch recommendations and guidance on selecting the right settings for your fabric type.
Setting Up the Machine for First Use
Before using your Singer sewing machine, ensure it is properly set up. Carefully unpack the machine and place it on a stable, flat surface. Install any included accessories, such as the sewing table or extension table. Wind the first bobbin and thread the machine as described in the threading guide. Use the handwheel to lower the needle slightly to ensure proper alignment. Test the machine on scrap fabric to ensure smooth operation. Refer to the manual for specific setup instructions tailored to your model, and ensure all parts are securely attached before sewing your first project.
Advanced Features and Stitch Settings
Singer sewing machines offer a variety of built-in stitches, from basic to decorative. Users can customize stitch length, width, and tension for precise control. Advanced models include programmable settings, memory functions, and automatic features like thread cutters and needle positioning. These features allow for versatile sewing, embroidery, and quilting. Explore the stitch chart in your manual to unlock creative possibilities and enhance your sewing projects with professional results.
Exploring Built-in Stitches and Patterns
Singer sewing machines feature an extensive range of built-in stitches, including straight, zigzag, decorative, and heirloom patterns; These stitches cater to various sewing needs, from basic repairs to intricate embroidery. The manual provides a detailed stitch chart, helping users identify and select the perfect stitch for their project. Decorative stitches add elegance to fabrics, while utility stitches ensure durability. Many models also offer programmable patterns, allowing for customization. By exploring these features, users can enhance their creativity and achieve professional-quality results. The manual guides users in navigating stitch selection and optimizing their machine’s capabilities for diverse sewing tasks.
Adjusting Stitch Length and Width
Singer sewing machines allow precise control over stitch length and width, ensuring optimal results for various fabrics and projects. The stitch length dial adjusts the distance between stitches, typically ranging from 0 to 4mm. The stitch width dial controls the stitch’s horizontal measurement, usually from 0 to 5mm. Longer stitches are ideal for heavy fabrics, while shorter ones suit delicate materials. Adjusting these settings ensures proper tension and prevents fabric stretching or puckering. Always test stitches on scrap fabric before sewing your final project. Refer to the manual for specific dial locations and model-specific adjustments to achieve the desired stitch quality.
Customizing Machine Settings
Customizing your Singer sewing machine settings enhances your sewing experience by tailoring operations to specific projects. Many Singer models allow users to save preferred stitch settings, making repeated tasks efficient. Adjustments can be made to stitch patterns, tension, and even needle position. Advanced models may offer customizable memory settings, enabling you to store frequently used stitches. Additionally, some machines allow synchronization of settings across devices or access to downloadable updates for expanded functionality. Always consult the manual to explore model-specific customization options. These features ensure your machine adapts to your creative needs, providing versatility and precision in every stitch. Experiment to unlock full potential.

Specific Singer Sewing Machine Models
Singer offers a diverse range of sewing machines, including heavy-duty, computerized, and vintage models, each designed for unique sewing needs and preferences, ensuring versatility.
Heavy Duty Series (4423, 4432, etc.)
The Singer Heavy Duty Series, including models like the 4423 and 4432, is engineered for durability and reliability, ideal for sewing thick fabrics like denim and canvas. These machines feature robust metal frames, powerful motors, and versatile stitch options. The 4423 offers 23 built-in stitches, while the 4432 includes 32 stitches, catering to both basic and decorative sewing needs. Designed for heavy use, they provide consistent performance and are popular among professionals and hobbyists alike. The manual for these models includes detailed setup guides, maintenance tips, and troubleshooting for optimal functionality.
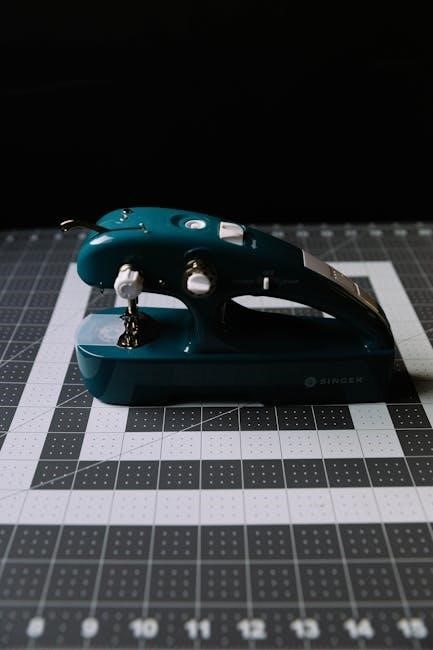
Computerized Models (Futura Series, etc.)
The Singer Futura Series, including computerized models, offers advanced sewing and embroidery capabilities. These machines feature large touchscreens, automatic threading, and customizable settings. They support Wi-Fi connectivity for downloading additional designs and updates. The manual provides guidance on navigating menus, selecting stitches, and using embroidery features. It also covers troubleshooting common issues like software glitches or connectivity problems. These models are ideal for crafters and professionals seeking versatility and precision. The manual ensures users can fully utilize the machine’s potential, from basic sewing to complex embroidery projects, with clear instructions for maintenance and optimization.
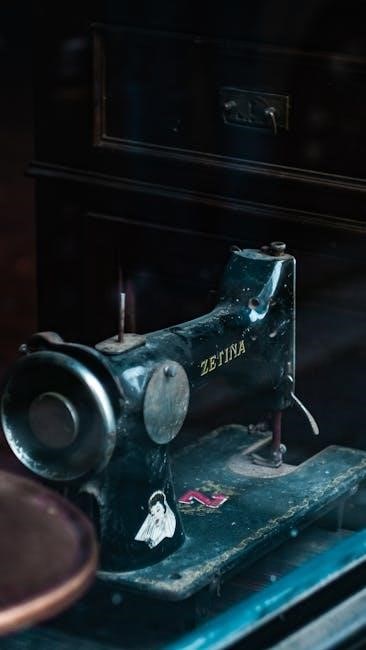
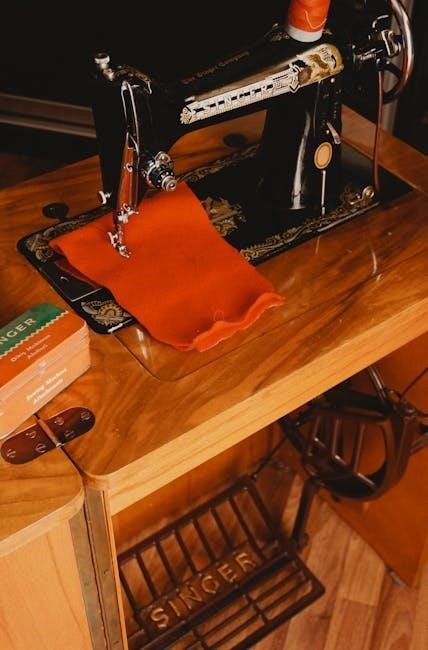
Vintage Models (201K, 15-88, etc.)
Singer’s vintage models, such as the 201K and 15-88, are renowned for their durability and classic design. These mechanical machines, produced from the mid-20th century, are prized for their simplicity and reliability. The manual for these models provides guidance on setup, maintenance, and troubleshooting. Key features include all-metal construction, precise stitch control, and versatility for both heavy-duty and delicate fabrics. While lacking modern computerized features, these models excel in basic sewing tasks. Manuals often include detailed diagrams for oiling and tension adjustment. Vintage Singer machines remain popular among collectors and sewers, offering timeless functionality and craftsmanship.
Troubleshooting Common Problems
Identify common issues like thread jams, uneven stitches, or machine noise. Consult the manual for solutions, including cleaning, oiling, and tension adjustments to ensure smooth operation.
Machine Not Turning On
If your Singer sewing machine won’t turn on, first check the power source. Ensure the machine is properly plugged into a working outlet and that no fuses or circuit breakers have tripped. Inspect the power cord for damage or tangles, and verify that it is securely connected to both the machine and the power source. If the issue persists, consult the manual for specific troubleshooting steps or contact Singer’s customer support for assistance. Always follow safety guidelines to avoid electrical hazards. Persistent issues may require professional servicing to diagnose and repair internal electrical components.
Issues with Stitch Quality
If your Singer sewing machine produces uneven stitches, loose threads, or inconsistent stitching, check the thread tension, bobbin alignment, and needle condition. Ensure the correct needle size and type are used for your fabric. Incorrect thread direction or improperly wound bobbins can also cause poor stitch quality. Clean the machine regularly to remove lint and debris, which can interfere with stitching. Adjust the stitch length and width settings according to the fabric thickness and type. Refer to your manual for guidance on optimizing stitch settings and troubleshooting specific stitch-related issues for your machine model. Proper maintenance can significantly improve stitch quality.
Understanding Error Messages
Singer sewing machines often display error messages to indicate specific issues. Codes like “E1” or “E2” usually relate to problems such as thread jams, incorrect needle positioning, or bobbin issues. Refer to your manual to decode these messages, as they vary by model. For example, some codes may indicate a faulty sensor, while others signal a mechanical issue. Always power off the machine before troubleshooting. Clearing the error often involves addressing the root cause, such as removing tangled threads or re-threading properly. If errors persist, consult the troubleshooting section or contact Singer support for assistance.

Repair and Service
Regular maintenance and prompt repairs ensure optimal performance. Use genuine Singer parts for reliability. For complex issues, consult authorized service centers or certified technicians to avoid further damage.
DIY Repair Tips and Tricks
For minor issues, DIY repairs can save time and money. Always power off the machine before starting. Use Singer-branded oils and lubricants for maintenance. Clean dust and lint regularly with a soft brush or vacuum. Replace needles every 8 hours of use to prevent breakage. Check thread tension and bobbin alignment for smooth stitching. Refer to the troubleshooting section for common fixes. Avoid forcing stuck parts, as this may cause further damage. Test the machine after repairs to ensure proper function. Keep spare parts like bobbins and needles handy for quick fixes.
When to Seek Professional Service
Consult a professional if issues persist after DIY attempts or for complex repairs. Electrical malfunctions, internal gear damage, or motor problems require expert attention. Avoid attempting repairs on critical components like timing belts or tension discs. If the machine is under warranty, contact Singer’s support to avoid voiding coverage. Never force parts or use unauthorized tools, as this can cause irreversible damage. For vintage models, seek specialists familiar with older mechanisms. Always use Singer-authorized service centers for genuine parts and reliable fixes. Regular professional servicing ensures optimal performance and extends the machine’s lifespan. Schedule annual check-ups to maintain your Singer sewing machine’s efficiency.
Warranty and Support Information
Singer sewing machines typically come with a limited warranty covering parts and labor for 1-5 years, depending on the model. To maintain warranty validity, ensure all repairs are done by authorized service centers. Register your machine on Singer’s official website to activate warranty benefits. For support, contact Singer’s customer service via phone, email, or live chat. Visit their website for troubleshooting guides, FAQs, and repair center locations. Extended warranties may be available for purchase. Always use Singer-approved parts to avoid voiding coverage. Genuine support ensures your machine performs optimally and extends its lifespan. Refer to the manual for specific warranty details and contact information.

Downloading and Accessing Manuals
Singer sewing machine manuals are easily accessible online in PDF format. Visit Singer’s official website or third-party archives for free downloads. Ensure authenticity by verifying sources before downloading to avoid unauthorized versions. These manuals provide detailed instructions, troubleshooting guides, and parts information. Downloading the correct manual for your specific model is essential for optimal use and maintenance. Save the manual on your device for quick reference and future use. Always prefer official sources to ensure accuracy and reliability of the information provided.
Free PDF Downloads Online
Singer sewing machine manuals are widely available as free PDF downloads online. Official Singer websites and trusted third-party sources offer these manuals, ensuring easy access to guidance. Users can search by model number or machine type to find the correct manual. These PDFs include detailed instructions, diagrams, and troubleshooting tips. They are ideal for users who prefer digital access or have lost their physical copy. Ensure authenticity by downloading from verified sources to avoid unauthorized versions. Free PDF downloads provide a convenient and cost-effective way to access essential information for maintaining and operating Singer sewing machines effectively.
Official Singer Website Resources
The Singer official website provides a dedicated support section for sewing machine manuals. Users can easily locate manuals by model number, ensuring accurate and relevant information. The site also features FAQs, video tutorials, and downloadable resources to enhance user experience. These official resources are reliable and up-to-date, offering comprehensive guidance for machine operation, maintenance, and troubleshooting. Additionally, the website includes warranty details and customer support contact information, making it a one-stop solution for Singer sewing machine owners. Accessing these resources ensures users have genuine and authoritative guidance for optimal machine performance and longevity.
Third-Party Manual Archives
Third-party manual archives provide alternative sources for Singer sewing machine manuals, especially for discontinued or vintage models. Websites like ManualsLib, ManualsOnline, and Scribd host a wide range of Singer manuals in downloadable formats. These platforms are useful when official resources are unavailable or hard to find. However, users should verify the authenticity and safety of these manuals to avoid downloading malicious files. Many archives also offer community forums and discussions, where users share tips and solutions. While convenient, third-party sources should be used cautiously, ensuring the information aligns with official Singer guidelines for accuracy and reliability.
Mastering your Singer sewing machine begins with understanding its manual. Proper usage, maintenance, and troubleshooting ensure optimal performance. Explore advanced features, customize settings, and create effortlessly. Happy sewing!
Key Takeaways from the Manual
Understanding your Singer sewing machine manual is crucial for optimal performance. Always follow safety guidelines, perform routine maintenance, and use genuine Singer accessories. Threading correctly is essential for smooth operation. Familiarize yourself with stitch settings and customize as needed. Regular lubrication and cleaning extend machine longevity. Troubleshoot common issues promptly to avoid damage. Explore advanced features for creative projects. Refer to the manual for specific model details and warranty information. By mastering these tips, you’ll enhance your sewing experience and ensure years of reliable service from your Singer machine.
Encouragement for Further Exploration
Now that you’ve mastered the basics, it’s time to explore the full potential of your Singer sewing machine. Experiment with built-in stitches, customize settings, and try sewing different fabrics. Don’t be afraid to push your creativity—your Singer machine is designed to adapt to your needs. Start with simple projects and gradually tackle more complex ones. Remember, practice makes perfect! Dive into online tutorials, sewing communities, and Singer’s official resources for inspiration. With your manual as your guide, continue discovering new techniques and enjoying the satisfaction of creating something unique. Happy sewing—your next masterpiece awaits!