

General Electric Oven Manual Self-Clean⁚ A Comprehensive Guide
This comprehensive guide will walk you through the process of self-cleaning your General Electric electric oven, ensuring a spotless and efficient appliance. From preparing the oven to initiating the self-clean cycle and completing post-clean procedures, we’ll cover all the essential steps to keep your oven sparkling clean.
Preparing for the Self-Clean Cycle
Before embarking on the self-clean cycle, it’s crucial to ensure the oven is properly prepared. This involves removing all items from the oven, including the racks, cookware, and utensils. The self-clean cycle operates at extremely high temperatures, and any items left inside could melt, damage, or even cause a fire. Additionally, it’s essential to wipe down any loose debris or spills with a damp cloth. This prevents excessive smoke and odor during the cleaning process. Removing loose debris ensures that the self-cleaning cycle focuses on removing stubborn baked-on grime and food particles, effectively restoring your oven to its pristine state. A clean oven is a safe oven, so taking these simple preparatory steps will ensure a successful and efficient self-cleaning experience.
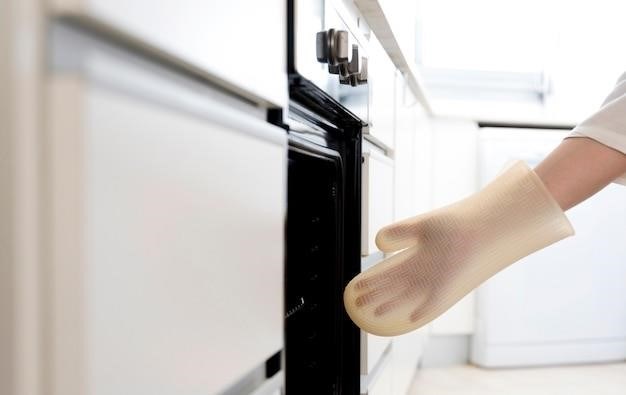
1.1. Removing Items from the Oven
The first step in preparing your GE oven for a self-clean cycle is to remove all items, ensuring a safe and effective cleaning process. This includes removing the oven racks, which are typically made of durable material, but can still be affected by the extreme heat of the self-clean cycle. Additionally, remove any cookware or utensils that may have been left inside the oven, as these items could melt or become damaged. Remember to also remove the broiler pan and grid, as these are often subjected to high temperatures during cooking and can benefit from a thorough cleaning. Finally, any loose food debris should be removed before starting the self-clean cycle, as this can create excessive smoke and odor during the cleaning process. By taking the time to remove all items from the oven, you’ll ensure that your oven is ready for a successful and efficient self-clean cycle, leaving it sparkling clean and ready for your next culinary adventure.
1.2. Wiping Down Loose Debris
After removing all items from your GE oven, the next step is to wipe down any loose debris with a damp cloth. This step is crucial for ensuring a successful self-clean cycle, as it eliminates any loose food particles that could create excessive smoke or interfere with the cleaning process. Focus on wiping down the oven floor and sides, paying particular attention to areas where food spills or splatters may have occurred. Use a soft cloth and avoid harsh scrubbing, as this could damage the oven’s enamel. You can also use a mild cleaning solution, but ensure it is safe for use on oven surfaces and avoid any abrasive cleaners that could scratch the enamel. By wiping down loose debris, you’ll set the stage for a clean and efficient self-clean cycle, resulting in a sparkling clean oven that’s ready for your next culinary creation.
Initiating the Self-Clean Cycle
Once your GE electric oven is prepped for self-cleaning, you’re ready to initiate the cycle; First, close the oven door securely, ensuring it latches properly. Next, locate the “Self-Clean” button on your oven’s control panel. This button might be labeled “Auto Clean” or “Auto Self Clean” depending on your model. Press the button and follow the prompts on the oven’s display. You’ll typically be presented with options for the self-clean cycle duration, which usually ranges from 2 to 4 hours. Select the desired duration based on the level of cleaning required and the amount of time you have available. The oven will then begin heating up to a high temperature, burning away food residue and leaving your oven sparkling clean. Remember to avoid opening the oven door during the self-clean cycle, as this can disrupt the process and potentially lead to safety hazards.
2.1. Locating the Self-Clean Button
The self-clean button on your GE electric oven is typically located on the oven’s control panel, which is usually situated above the oven door. It might be labeled as “Self-Clean,” “Auto Clean,” or “Auto Self Clean,” depending on the specific model of your oven. The button is usually easy to spot, as it’s often a dedicated button with a clear icon or label. If you’re having trouble locating the self-clean button, consult your oven’s user manual for specific instructions and a visual representation of the button’s location. The user manual will provide detailed information on how to initiate the self-clean cycle and navigate the various settings available. Once you’ve located the self-clean button, you can confidently proceed with the self-clean cycle, ensuring a spotless and hygienic oven for your culinary endeavors.
2.2. Selecting the Cycle Duration
Once you’ve located the self-clean button and initiated the self-clean cycle, you’ll need to select the duration of the cleaning process. The self-clean cycle duration typically ranges from 2 to 4 hours, depending on the model of your GE electric oven and the level of grime or baked-on food residue that needs to be removed. Your oven’s control panel will likely display a range of options for the self-clean cycle duration, allowing you to choose the setting that best suits your needs. If your oven has a preset clean time of 3 hours, you can adjust it by pressing the “plus” or “minus” buttons on the control panel until the desired stop time appears. It’s recommended to select a longer cycle duration for heavily soiled ovens, ensuring a thorough cleaning process. Choosing the appropriate cycle duration will ensure that your oven is effectively cleaned without unnecessary energy consumption.
Safety Precautions During Self-Clean
The self-clean cycle involves extremely high temperatures, reaching up to 950 degrees Fahrenheit, making safety precautions crucial. Ensure proper ventilation during the self-clean cycle by opening a window or using a ventilation fan or hood to minimize smoke and odors. The high heat generated during the self-clean cycle can be dangerous, so it is essential to keep children and pets away from the oven. Never attempt to open the oven door during the self-clean cycle, as doing so could result in severe burns. The oven door will be locked during the self-clean cycle, preventing accidental opening. After the cycle is complete, allow the oven to cool down completely before opening the door. The oven will be extremely hot and could cause burns if opened prematurely. It is essential to follow all safety guidelines provided in your GE electric oven manual to ensure a safe and effective self-clean process.
3.1. Oven Temperature and Ventilation
The self-clean cycle heats the oven to incredibly high temperatures, often exceeding 850 degrees Fahrenheit. This extreme heat can create a significant amount of smoke and odor. To ensure safe and effective operation, adequate ventilation is paramount. Open a window or use a ventilation fan or hood during the self-clean cycle to expel the smoke and odors. This will prevent them from accumulating in your kitchen and potentially triggering smoke alarms. Always monitor the oven during the self-clean cycle, and if you notice excessive smoke or unusual odors, discontinue the cycle and ventilate the area thoroughly. Remember, proper ventilation is essential for a safe and comfortable self-clean experience, minimizing potential hazards and ensuring a clean oven without compromising your kitchen environment.
3.2. Locking the Oven Door
Safety is paramount during the self-clean cycle, and a locked oven door plays a crucial role in preventing accidents. During the self-clean cycle, the oven door will automatically lock, preventing accidental opening and potential burns. The locking mechanism ensures that the oven remains sealed and prevents the release of extreme heat and potential hazards. The lock will remain engaged until the self-clean cycle is complete and the oven has cooled down to a safe temperature. Some models may feature a visual indicator, such as a light, to signal when the door is locked. Never attempt to force the door open during the self-clean cycle, as this can lead to injury and damage to the oven. Allow the cycle to complete and the oven to cool down before attempting to open the door. The locked door safeguards you and your family from the extreme heat and ensures a safe and efficient self-clean experience.
Post-Self-Clean Procedures
Once the self-clean cycle is complete and the oven has cooled down, you can proceed with the post-clean procedures. The oven will have reached an extremely high temperature during the self-clean cycle, so it’s essential to allow it to cool down completely before opening the door. This cooling down time can vary depending on the model and cycle duration, but generally, it will take around one to two hours. After the oven has cooled, you can safely open the door and proceed with the next step. You’ll find a layer of ash and debris at the bottom of the oven, which is a result of the burned-on food particles. This ash should be easily wiped away with a damp cloth or sponge. Some ovens may feature a removable ash pan for easy disposal. Once the ash has been removed, you can wipe down the interior of the oven with a damp cloth to remove any remaining residue. Ensure that the oven is completely dry before using it again.
4.1. Cooling Down Time
After the self-clean cycle has completed, it’s crucial to let the oven cool down completely before opening the door. The oven will have reached extremely high temperatures during the self-clean cycle, and opening the door too soon can cause severe burns. The cooling down time can vary depending on the model and cycle duration, but generally, it will take around one to two hours. During this time, the oven will gradually cool down, and the internal temperature will drop to a safe level. You can check the oven temperature with a thermometer if you’re unsure. Once the oven has cooled down sufficiently, the lock light on the control panel will turn off, indicating that the oven is safe to open. It’s best to err on the side of caution and wait until the oven has completely cooled down before opening the door. This will ensure your safety and prevent any potential accidents.
4.2. Removing Ash and Debris
Once the oven has cooled down completely, you can proceed to remove any remaining ash and debris. The self-clean cycle will have burned away most of the food residue, but some ash may remain in the bottom of the oven. Use a damp cloth or sponge to wipe out the ash and any other loose debris. You can use a mild dish soap if necessary, but avoid abrasive cleaners or scouring pads, as they could damage the oven’s enamel. The self-clean cycle may also leave a white, powdery residue on the oven walls and racks. This is simply burned-on food residue, and it can be easily removed with a damp cloth. If the residue is stubborn, you can use a baking soda paste to loosen it. Make sure to clean the oven racks thoroughly, as they may have accumulated grease and grime. Once you’ve removed all the ash and debris, you’re ready to use your oven again.
Alternative Cleaning Methods
While the self-clean cycle is a convenient way to clean your oven, it’s not always necessary for light messes. For minor spills and splatters, consider alternative cleaning methods that can save you time and energy. A steam clean feature, available on some models, offers a gentle yet effective way to loosen grime. Simply pour a cup of water into the bottom of a cool oven, close the door, and select the steam clean cycle. This method uses steam to soften food residue, making it easier to wipe away. Alternatively, you can manually clean your oven using baking soda. Mix baking soda with water to create a paste, apply it to the affected areas, and let it sit for a few minutes. The baking soda will help to break down grease and grime, making them easier to remove. These alternative cleaning methods can be used regularly to maintain a clean oven and prevent the buildup of heavy grime that may require a self-clean cycle.
5.1. Steam Clean Feature
For those times when a full self-clean cycle seems excessive, the Steam Clean feature offers a gentler, faster solution. This option, available on select GE oven models, utilizes the power of steam to loosen and soften food residue, making it easier to wipe away. To activate the steam clean, simply pour a cup of water into the bottom of a cool oven, close the door, and select the steam clean cycle. The cycle typically lasts around 30 minutes, and during this time, the oven will heat up, generating steam that effectively loosens and softens any baked-on food debris. Once the cycle is complete, the oven will cool down, and you can easily wipe away any remaining residue with a damp cloth. The Steam Clean feature is an ideal alternative for light messes, saving you time and energy compared to a full self-clean cycle.
5.2. Manual Cleaning with Baking Soda
For those who prefer a more hands-on approach or have a less severe mess, manual cleaning with baking soda offers a safe and effective alternative to self-cleaning. Baking soda is a natural abrasive that can effectively break down grease and grime without harsh chemicals. To clean your oven with baking soda, first, preheat the oven to a low temperature, around 200 degrees Fahrenheit, for about 15 minutes. This will soften any baked-on food residue. Then, turn off the oven and let it cool slightly. Next, mix baking soda and water into a paste. Apply this paste to the inside of the oven, focusing on any heavily soiled areas. Allow the paste to sit for about 30 minutes, then use a damp cloth to wipe away the paste and any loosened residue. For stubborn stains, you can sprinkle baking soda directly onto the area and let it sit for a few hours before wiping it away. Remember to avoid using abrasive cleaners on the oven’s interior, as they can damage the enamel coating. Regular manual cleaning with baking soda can help keep your oven clean and prevent the need for frequent self-cleaning cycles.