Machine Manual: A Comprehensive Guide
Welcome! This document provides essential guidance for safe and effective operation‚ maintenance‚ and troubleshooting of your newly acquired machinery.
Welcome to a new era of efficiency! This section serves as your initial gateway to understanding the core principles behind this innovative machine. Before diving into detailed operations‚ it’s crucial to grasp its fundamental purpose and how it’s designed to integrate into your workflow.
This machine represents a significant advancement in its field‚ offering unparalleled precision and reliability. We’ve engineered it with user-friendliness in mind‚ but a thorough understanding of its capabilities is paramount for maximizing its potential. This manual is structured to guide you‚ from initial setup to advanced functionalities‚ ensuring a smooth and productive experience.
Throughout this guide‚ we prioritize safety. Always adhere to the outlined precautions to prevent accidents and maintain the longevity of the machine. Remember‚ proper operation and regular maintenance are key to unlocking its full performance spectrum and achieving optimal results. Let’s begin your journey towards mastering this powerful tool!
Purpose of this Manual
This manual is your definitive resource for all aspects of the machine’s lifecycle‚ from initial setup and daily operation to comprehensive maintenance and troubleshooting. Its primary goal is to empower you – the operator – with the knowledge and confidence to utilize the machine safely‚ efficiently‚ and to its full potential.
We’ve meticulously documented every procedure‚ feature‚ and safety guideline to minimize downtime and maximize productivity. This isn’t simply a list of instructions; it’s a comprehensive guide designed to foster a deep understanding of the machine’s inner workings. It aims to prevent errors‚ address common issues proactively‚ and ensure consistent‚ high-quality results.
Furthermore‚ this manual serves as a reference point for identifying components‚ understanding their functions‚ and performing necessary adjustments. By following the outlined procedures‚ you’ll contribute to the machine’s longevity and maintain its optimal performance for years to come. Consider it an investment in your success and the machine’s sustained reliability.
Machine Overview & Intended Use
This machine is a precision-engineered piece of equipment designed for [insert specific application here – e.g.‚ high-volume packaging‚ automated welding‚ precision cutting]. It’s built to deliver consistent‚ reliable performance in demanding environments‚ offering a significant improvement in efficiency and output compared to traditional methods.
The core functionality revolves around [briefly describe the core process – e.g.‚ automated material handling‚ controlled temperature application‚ precise component assembly]. It achieves this through a combination of advanced mechanical systems‚ sophisticated electronic controls‚ and intuitive software interfaces. The machine is intended for use by trained personnel in a controlled industrial setting.
Specifically‚ it’s ideally suited for applications requiring [list 2-3 key application characteristics – e.g.‚ high accuracy‚ rapid throughput‚ minimal material waste]. It is not intended for use in hazardous environments or for applications outside of its specified operational parameters. Attempting to do so may void the warranty and create a safety risk.
Safety Precautions ― General Guidelines
Prior to operating this machine‚ all personnel must thoroughly read and understand this manual‚ paying close attention to all safety warnings and procedures. Always wear appropriate Personal Protective Equipment (PPE)‚ including safety glasses‚ hearing protection‚ and appropriate work attire – avoiding loose clothing and jewelry.
Ensure the work area is clean‚ well-lit‚ and free of obstructions. Never operate the machine while fatigued or under the influence of drugs or alcohol. Regularly inspect all safety devices‚ such as guards and emergency stops‚ to confirm they are functioning correctly. Do not attempt to bypass or disable any safety features.
Maintain a safe distance from moving parts during operation. Be aware of potential pinch points and crush hazards. Report any unusual noises‚ vibrations‚ or malfunctions immediately to a supervisor. Unauthorized modifications or repairs are strictly prohibited and may compromise machine safety. Always follow lockout/tagout procedures before performing any maintenance.
Machine Components & Identification
Understanding the machine’s architecture is crucial for effective operation and maintenance. This section details the primary assemblies and individual parts that comprise the system. Familiarization with these components will aid in troubleshooting‚ repair‚ and ordering replacement parts.

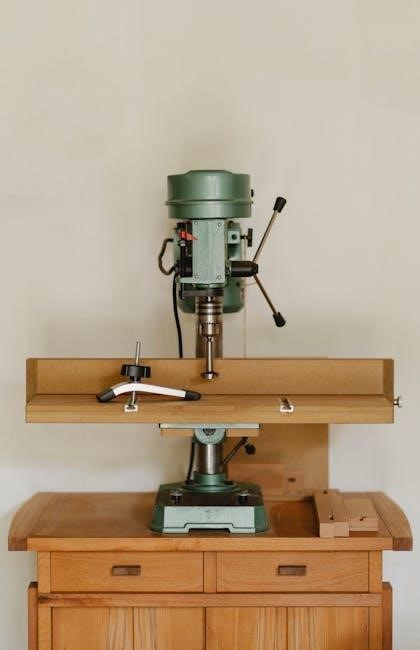
The machine is constructed around a robust frame assembly providing structural integrity. Key functional units include the power transmission system‚ the control panel housing operational interfaces‚ and the processing unit where the core work is performed. Additional components encompass safety guards‚ lubrication systems‚ and cooling mechanisms.
Refer to the detailed diagram on the following page for a visual representation of component locations. A comprehensive parts list‚ including part numbers and descriptions‚ is also provided. Note: Optional attachments and accessories are detailed in a separate section and are not included in this core component overview. Proper identification ensures correct part selection during maintenance or repair procedures.
Major Assemblies Breakdown
This section provides a detailed examination of the machine’s primary structural and functional groupings. Understanding these assemblies is vital for both routine maintenance and complex repairs. We will dissect the machine into its core components‚ explaining the role of each.
The Base Frame Assembly forms the foundational support‚ ensuring stability during operation. Above this sits the Drive System Assembly‚ encompassing the motor‚ gears‚ and belts responsible for power transmission. The Workstation Assembly is where material processing occurs‚ featuring adjustable settings and tooling mounts. Crucially‚ the Control System Assembly integrates the electrical components‚ sensors‚ and user interface.
Each assembly is designed for modularity‚ allowing for easier servicing and component replacement. Important: Disassembly of any assembly should only be performed by qualified personnel following the procedures outlined in the ‘Maintenance & Troubleshooting’ section. Diagrams illustrating each assembly’s construction are provided for clarity. Proper understanding of these breakdowns streamlines repair processes and minimizes downtime.
Identifying Key Parts – Diagram & List
To facilitate maintenance and ordering of replacement parts‚ this section presents a comprehensive diagram and accompanying list of the machine’s key components. The diagram‚ found on the following page‚ provides a visual representation with numbered callouts corresponding to the parts list below.
Key Parts List: 1. Motor Housing‚ 2. Drive Belt‚ 3. Control Panel‚ 4. Emergency Stop Button‚ 5. Worktable Surface‚ 6. Cutting Blade (or equivalent processing tool)‚ 7. Safety Guard‚ 8. Power Switch‚ 9. Base Frame‚ 10. Adjustment Knob‚ 11. Sensor Array‚ 12. Grounding Terminal.
Optional Attachments & Accessories
Enhance the versatility of your machine with a range of optional attachments and accessories designed to expand its capabilities. These additions cater to specialized tasks and improve overall efficiency. Please review the following options carefully to determine which best suit your operational needs.
Available Accessories: 1. Extended Worktable – Provides increased surface area for larger projects. 2. Precision Guide Rail – Ensures accurate and consistent cuts or processing. 3. Dust Collection System – Maintains a cleaner work environment and improves air quality. 4. Specialized Cutting Blades/Tools – Optimized for specific materials. 5. Digital Readout Kit – Offers precise measurements and improved control. 6. Remote Control Unit – Enables convenient operation from a distance.
Important Note: Attachments are sold separately. Compatibility should be verified before purchase. Installation instructions are included with each accessory. Warning: Using non-approved attachments may void the warranty and pose a safety risk. Refer to our website or contact customer support for the latest accessory catalog and pricing.
Setting Up the Machine
Proper setup is crucial for optimal performance and longevity of your machine. This section details the necessary steps to prepare the unit for operation‚ ensuring a safe and efficient working environment. Carefully follow these instructions to avoid potential damage or injury.
Preparation is Key: Before beginning‚ ensure you have adequate space‚ appropriate tools (specified in the included tool list)‚ and a clear understanding of the installation requirements. Verify the machine is placed on a level‚ stable surface capable of supporting its weight. Inspect all components for shipping damage.
Essential Steps: This process involves unpacking‚ initial inspection‚ confirming installation requirements (power specifications‚ ventilation needs‚ and surrounding space)‚ and finally‚ connecting the power supply with strict adherence to grounding procedures. Caution: Incorrect power connection can lead to malfunction or electrical hazard. Always consult a qualified electrician if unsure.
Unpacking and Initial Inspection
Carefully unpack the machine from its shipping container‚ retaining all packaging materials until the unit is fully inspected and operational. Use caution when cutting the packaging to avoid damaging internal components. A thorough inspection is vital to identify any potential shipping-related damage.
Detailed Examination: Begin by verifying the contents against the packing list. Check for missing parts or obvious signs of physical damage – dents‚ scratches‚ or broken components. Pay close attention to control panels‚ moving parts‚ and any glass or fragile elements. Document any discrepancies or damage with photographs.
Reporting Issues: Immediately report any damage or missing parts to the supplier and the shipping carrier. Do not attempt to operate a damaged machine. Retain all documentation related to the shipment and inspection for warranty claims. Important: Initial inspection voids no warranty‚ reporting damage does not!
Installation Requirements (Power‚ Space‚ etc.)

Power Supply: This machine requires a dedicated 220V‚ 50Hz power supply. Ensure the electrical outlet is properly grounded and capable of handling the machine’s 15-amp draw. Do not use extension cords or adapters. A qualified electrician should verify the electrical installation.
Space Allocation: Allocate a minimum of 6ft x 4ft of clear‚ level floor space around the machine for safe operation and maintenance access. Ensure adequate ventilation to prevent overheating. Avoid placing the machine near flammable materials or sources of excessive moisture.
Environmental Conditions: The machine is designed for indoor use within a temperature range of 15°C to 30°C (59°F to 86°F) and humidity levels between 30% and 70%. Caution: Operating outside these parameters may affect performance and void the warranty. Confirm sufficient lighting for visibility.
Connecting Power & Grounding Procedures
Power Connection: Before connecting the power cord‚ verify the machine’s voltage selector switch (located on the rear panel) matches your local power supply. Insert the power plug firmly into the grounded outlet. Never force the plug.
Grounding: Proper grounding is essential for safety. The machine is equipped with a three-prong grounding plug. Do not remove or bypass the grounding pin. If a two-prong outlet is encountered‚ consult a qualified electrician to install a proper grounding connection.
Verification: After connection‚ visually inspect the power cord for any damage. Before powering on‚ ensure the grounding connection is secure. A continuity test with a multimeter can confirm proper grounding. Warning: Incorrect grounding can lead to electric shock. Always disconnect power before inspecting or modifying electrical connections.

Operating Instructions
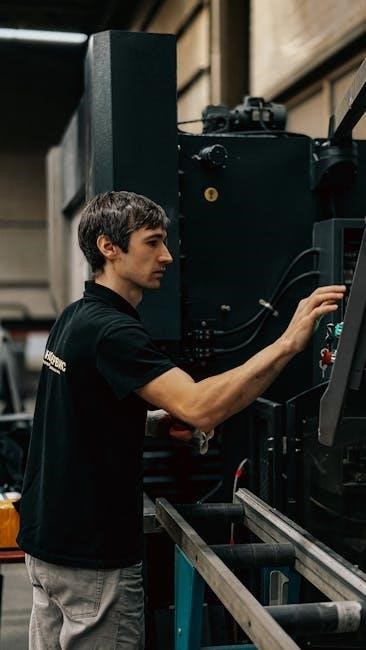
Initial Operation: Following setup and safety checks‚ proceed with powering on the machine. Familiarize yourself with the control panel layout before initiating any processes. Observe all indicator lights and listen for any unusual sounds during startup.
Workflow: Ensure all materials are correctly positioned and secured before activating the machine. Adhere strictly to the recommended material specifications outlined in the ‘Materials Guide’ appendix. Monitor the process continuously‚ making adjustments as needed via the control panel.
Best Practices: Avoid overloading the machine beyond its specified capacity. Regularly inspect processed materials for quality control. Caution: Never reach into moving parts during operation. Refer to the ‘Troubleshooting’ section for addressing operational anomalies. Always power down and disconnect before performing any maintenance.
Powering On & Initial Startup Sequence
Step 1: Verify the main power switch‚ located on the rear panel‚ is in the ‘OFF’ position. Ensure the emergency stop button is released (rotated clockwise). Step 2: Connect the power cord to a grounded outlet matching the machine’s voltage requirements (see ‘Installation Requirements’).
Step 3: Switch the main power switch to the ‘ON’ position. The power indicator light should illuminate. Step 4: Press the ‘START’ button on the control panel. The machine will initiate a self-diagnostic sequence‚ indicated by flashing lights and audible tones.
Step 5: Observe the display panel for any error messages. If errors are detected‚ consult the ‘Troubleshooting’ section. Once the self-diagnostic sequence completes successfully‚ the ‘READY’ indicator will illuminate‚ signifying the machine is prepared for operation. Caution: Do not attempt operation if the ‘READY’ indicator does not illuminate.
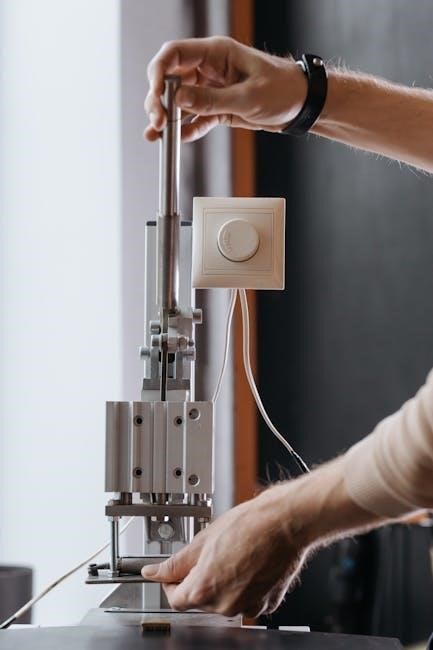
Basic Operation – Step-by-Step Guide
Step 1: Ensure the machine is in ‘READY’ mode (see ‘Powering On & Initial Startup Sequence’). Step 2: Load the material to be processed‚ adhering to the specified size and weight limitations outlined in ‘Machine Overview & Intended Use’. Securely fasten the material using the provided clamps.
Step 3: On the control panel‚ input the desired processing parameters – speed‚ duration‚ and intensity – using the numerical keypad and selector dials. Step 4: Double-check all settings before initiating the process. Step 5: Press the ‘RUN’ button to commence operation.
Step 6: Monitor the process through the viewing window. Do not attempt to open the enclosure during operation. Step 7: Upon completion‚ the machine will automatically stop‚ and an audible signal will sound. Carefully remove the processed material. Caution: Material may be hot!
Advanced Features & Functionality
Automated Sequencing: This machine supports pre-programmed sequences for repetitive tasks. Access the ‘Sequence Editor’ via the main menu to create‚ modify‚ and store custom routines. Refer to Appendix A for detailed instructions on sequence programming.
Precision Adjustment Mode: For intricate work‚ engage ‘Precision Mode’ for finer control over processing parameters. This mode allows adjustments in increments as small as 0.01 units. Data Logging: The integrated data logger records operational parameters for analysis and quality control. Data can be exported via USB.

Remote Control Capability: Utilizing the optional wireless module (sold separately)‚ the machine can be operated remotely via a compatible device. Error Diagnostics: The advanced diagnostic system provides detailed error codes and troubleshooting suggestions. Consult ‘Common Issues & Solutions’ for interpretation. Note: Utilizing advanced features requires specialized training.
Maintenance & Troubleshooting
Preventative maintenance is crucial for optimal performance and longevity. Regular cleaning‚ lubrication‚ and inspection of key components will minimize downtime and extend the machine’s lifespan. Always disconnect power before performing any maintenance procedures. A detailed schedule is provided in the ‘Routine Maintenance Schedule’ section.
Troubleshooting common issues often begins with verifying power connections and checking for obvious obstructions. The machine’s display panel provides error codes that can assist in diagnosing problems. Refer to the ‘Common Issues & Solutions’ section for a comprehensive guide to resolving frequently encountered difficulties.
If the problem persists‚ contact qualified service personnel. Do not attempt repairs beyond your skill level. Ignoring warning signs or attempting unauthorized repairs may void the warranty and create safety hazards. Keep a log of all maintenance and repair activities for future reference.
Routine Maintenance Schedule
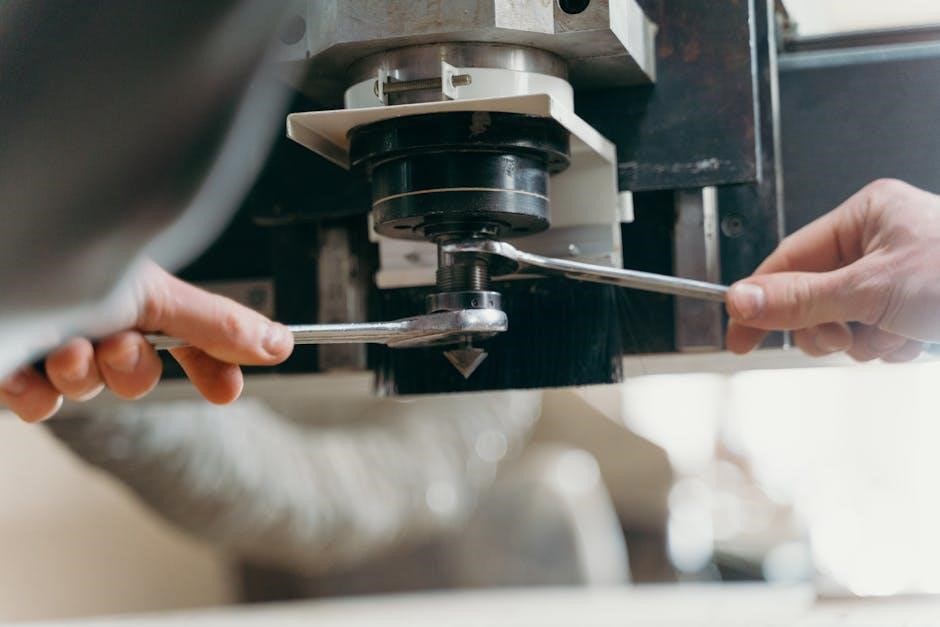
Daily: Inspect all cables and connections for damage. Clean the work surface and remove any debris. Verify emergency stop functionality. Weekly: Lubricate moving parts as indicated in the lubrication diagram (see section 2.2). Check fluid levels (if applicable) and top up as needed. Inspect safety guards and ensure they are securely fastened.
Monthly: Perform a thorough cleaning of the entire machine‚ including internal components (with power disconnected). Inspect belts and pulleys for wear and tear. Tighten any loose bolts or screws. Quarterly: Check and replace air filters (if applicable). Calibrate sensors and instruments according to the calibration procedure.
Annually: Schedule a professional inspection and service by a qualified technician. Replace worn or damaged parts. Review and update the maintenance schedule as needed based on machine usage and operating conditions. Maintain a detailed log of all maintenance activities.
Common Issues & Solutions
Issue: Machine fails to power on. Solution: Check power cord connection‚ circuit breaker‚ and emergency stop button. Issue: Unusual noises during operation. Solution: Inspect moving parts for obstructions or wear; lubricate as needed. Issue: Reduced performance or output. Solution: Check for clogged filters‚ worn belts‚ or incorrect settings.
Issue: Error messages displayed on the control panel. Solution: Consult the error code list in Appendix A for specific troubleshooting steps. Issue: Overheating. Solution: Ensure adequate ventilation and check cooling fans. Issue: Material jams. Solution: Follow the jam clearing procedure outlined in section 4.3.

If the problem persists after attempting these solutions‚ do not attempt further repairs yourself. Contact qualified service personnel for assistance. Always disconnect power before performing any maintenance or repairs. Record the issue and attempted solutions for the technician.
Emergency Stop Procedures & Resetting
In an emergency‚ immediately press the nearest Emergency Stop (E-Stop) button. This will cut power to all moving parts. Confirm all motion has ceased before attempting any intervention. Do not restart the machine until the cause of the emergency has been identified and corrected.
To reset the machine after an E-Stop activation‚ follow these steps: 1) Correct the issue that triggered the E-Stop. 2) Turn the E-Stop button clockwise to release it. 3) Power on the machine and follow the initial startup sequence (Section 4.1). 4) Verify all safety guards are in place.
Regularly test the E-Stop functionality to ensure it is working correctly. Familiarize all operators with the location of E-Stop buttons. Never bypass or disable the E-Stop system. Report any E-Stop malfunctions immediately to maintenance personnel.
Safety & Emergency Procedures
Prioritizing safety is paramount when operating this machine. This section details critical procedures to prevent accidents and respond effectively to emergencies. Always wear appropriate Personal Protective Equipment (PPE)‚ including safety glasses‚ hearing protection‚ and appropriate footwear. Ensure a clear and unobstructed workspace around the machine.
Be aware of all potential hazards‚ including moving parts‚ pinch points‚ and electrical components. Never operate the machine while fatigued or under the influence of substances. Immediately report any unsafe conditions to your supervisor. Familiarize yourself with the location of all safety devices‚ such as emergency stop buttons and safety guards.
In case of an emergency‚ activate the emergency stop and follow established evacuation procedures. Know the location of first aid kits and emergency contact information (Section 6.3). Regular safety training is essential for all operators.
Detailed Safety Warnings & Hazards
WARNING: Rotating parts pose a significant entanglement hazard. Keep hands‚ clothing‚ and hair clear of all moving components during operation. Failure to comply may result in severe injury. CAUTION: High-voltage electrical components are present within the machine. Do not attempt to access or repair electrical systems unless properly trained and qualified.
NOTICE: This machine generates noise levels that may cause hearing damage. Always wear appropriate hearing protection. DANGER: Improper grounding can lead to electric shock. Ensure the machine is properly grounded before operation (Section 3.3). Avoid operating the machine in wet or damp environments.
Be mindful of ejected materials. Always use appropriate shielding and wear safety glasses. Never bypass or disable safety guards. Regularly inspect all safety devices to ensure proper functionality. Report any damaged or malfunctioning safety features immediately.
Emergency Shutdown Protocol
In the event of an emergency‚ immediately activate the Emergency Stop (E-Stop) button‚ prominently located on the front panel and at designated remote stations; Pressing the E-Stop will instantly cut power to all machine functions‚ halting operation. Verify complete machine stoppage before attempting any intervention.
Following E-Stop activation‚ identify and address the cause of the emergency before attempting a restart. Do not bypass the E-Stop mechanism or attempt to reset the machine until the situation is safe. Consult Section 3.4 for detailed resetting procedures. Ensure all personnel are clear of the machine’s operational area.
If a fire occurs‚ activate the nearest fire alarm and evacuate the area immediately. Do not attempt to extinguish the fire yourself unless properly trained and equipped. Report all emergency incidents to designated safety personnel. Regularly practice emergency shutdown drills to ensure familiarity with the protocol.
First Aid Information (Related to Machine Use)
For minor cuts or abrasions‚ immediately wash the affected area with soap and water. Apply a sterile bandage to prevent infection. If bleeding persists‚ apply direct pressure until controlled. Report all injuries‚ regardless of severity‚ to a supervisor.
In case of eye contact with debris or fluids‚ flush the eye continuously with clean water for at least 15 minutes. Seek immediate medical attention. For burns‚ cool the affected area with cool (not ice-cold) water for 20 minutes. Do not apply ointments or break blisters. Seek medical attention for serious burns.
If a foreign object is lodged in the eye‚ do not attempt to remove it. Cover the eye and seek immediate medical attention. For muscle strains‚ apply ice and rest the affected area. Ensure all personnel are aware of the location of the first aid kit and emergency contact information.